Installing Becker Traffic Pro 4765 satnav into Freelander
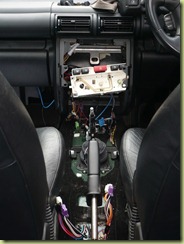
I’ve wanted the Becker satnav for the Freelander for ages. When one came along at the right price I decided to go for it. The install is quite involved as the main head unit to speakers loom has to be replaced. There is also an extra ECU for the steering wheel controls.
Parts required: –
| Item | Part Number/ Description |
Notes |
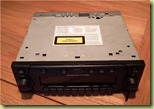 |
Becker Traffic Pro 4765 | The nav unit itself. |
 |
HARNESS-LINK, BECKER, WITH AMPLIFIER, WITH CD AUTO CHANGER, REMOTE ICE, NAVIGATIONAL SYSTEM
YMQ001520 |
I decided to go with the loom that has the Harman Kardon amplifier with it. I haven’t got the amplifier yet but I had a plan to get around that
This was purchased from LR Series |
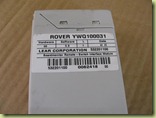 |
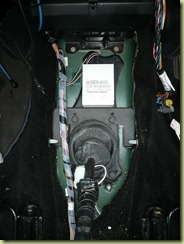
INTERFACE UNIT-REMOTE CONTROL
YWQ100031L |
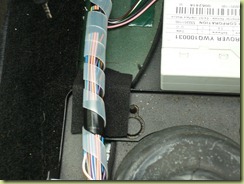
This is required as the Becker unit cannot read the steering wheel resistor ladder directly like the standard unit. The ECU reads the steering wheel controls and converts them to I-Bus messages which the Becker unit can understand.
These are quite pricey and can be bought from Britcar, John Craddock and Rimmer Brothers. I got mine off eBay for £10! It’s badged as a Rover unit but it still works. |
 |
AMPLIFIER AUDIO POWER, HARMON KARDON XQK100300 |
XQK100300 has been superseded by XQK100301. This unit is extremely expensive at around £400 from Britcar
I’m going to look for one of these at the shows this year so for now I’ve bridged out the amplifier connections. See below for more details. |
| PICTURE TO BE ADDED LATER | BRACKET-AMPLIFIER MOUNTING
XQU100980 |
Hoping that the amplifier will come with this bracket. However if it doesn’t, it can be bought from LR Series |
Installation
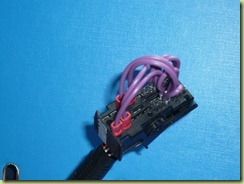
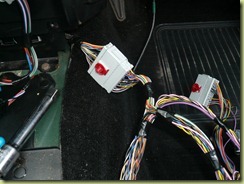
Unfortunately as I had no amplifier there wasn’t any sound coming out of the speakers. After much studying of RAVE I worked out that I could bridge out the amplifier connections to get the sound through.
 |
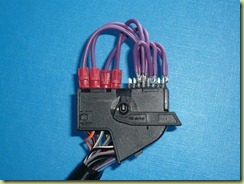 |
This is just temporary until I can get the amplifier. Following this the sound came through ok. The sound is much better than the old C42. It seems fuller and more detailed. It should sound amazing when it does get an amplifier!
Useful Documents (Registration required)
Freelander ICE Circuit Diagrams
STC53069 Navigation Installation Instructions
Freelander Navigation System Description
Becker Installation Instructions
For further information, take a look at the excellent article on Discovery 2 Website.
Coming soon – Connecting a iPod in place of the CD player.
Hi, I’m thinking of installing one of these in my Disco and found your article useful. Also found some useful information on an eBay auction. I’ve pasted it in here for you: –
If you do not already have this unit fitted you will need the following parts –
Discovery 11
—————
XUI000070 – Aerial – 90.00 pounds
YWQ100031L – Module – 75.99 pounds
XUD000020 – Cable – 45.00 pounds
YWU000050 – Bracket for Module – 3.58 pounds
Freelander
————
XUC000030 – Aerial Base- 46.00 pounds
YUJ000020 – Aerial – 44.87 pounds
YWQ100031L – Module – 75.99 pounds
YMQ001530 – Cable – 89.86 npounds
YWU000050 – Bracket for Module – 3.58 pounds
Thanks for the info. Love the site
Like Discoguy, I’m trying to fit the Becker unit to the Disco 2, but ran into a major problem when I first started as my wagon is an E spec and has nothing fitted.
So what I’d like to know is, does the Becker unit need the HK amp to function? and if so is there a way of 1. fitting the wiring loom or 2. By passing the amp all together?
Cheers
BoBo
I fitted mine to a Freelander and swapped the loom. It was a plug in part (YMQ001520) so no wire splicing needed.
However, the Becker unit doesn’t need an amp to work. If your Disco has an ISO loom to fit the stereo that came with the vehicle, you should be ok. If it has the BMW connector like this then you’ll need an adapter like this.
Have a look here and here to see the Freelander install.
Also have a look at this Disco 2 satnav install article
Let us know how you get on.
Jason