Coolant Outlet Elbow Replaced
As per the previous post, I’d found the source of a slow coolant leak I’d had for some time so today I got the opportunity to fix it. I’d ordered and collected all the parts I needed during the week so I was ready to start first thing this morning after several cups of tea first of course…
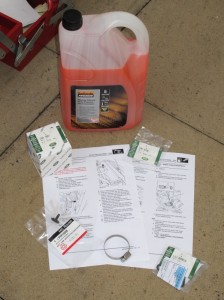
First thing to do was remove the acoustic cover from the top of the engine, it’s only held with three bolts, two 13mm bolts on the passenger side and one 15mm bolt on the drivers side, with that out of the way you can see what you’re up against. Next get yourself a load of old rags or paper towel and stuff it under the outlet elbow and surrounding area, removing the top hose from the outlet causes coolant to spill out, there’s no way of catching it so it’s a case of damage limitation. You’ll probably lose somewhere between 1-2 litres of coolant so make sure you’ve got plenty for topping up later on, I bought a 5 litre tub of ready mixed OAT coolant for ease of use. Before removing the top hose you first need to remove the electrical plug for the coolant temperature sensor, simply unclip this and secure out of the way so that it doesn’t get wet.
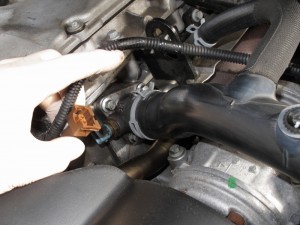
Release the spring clip that secures the top hose to the outlet, I bought a stainless steel replacement ‘jubilee’ clip for reassembly later, pull the hose from the outlet and get ready for a steady flow of coolant to escape. Once the coolant has stopped flowing undo the three 10mm bolts that hold the outlet to the cylinder head, access is awkward and I ended up using various extension bars and universal joints to get some purchase on the bolts. Next remove the outlet, it may need a swift tap with a rubber mallet to ‘break’ the seal and free it from the cylinder head. Carefully clean off any remnants of the old gasket from the mating surface taking care not to let any debris enter the coolant gallery.
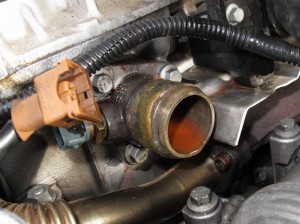
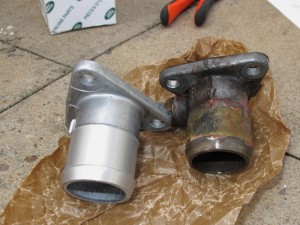
With the outlet elbow free you’ll next need to remove the coolant temperature sensor (19mm spanner), I’d bought a new washer for the sensor as I didn’t want to risk any leaks.
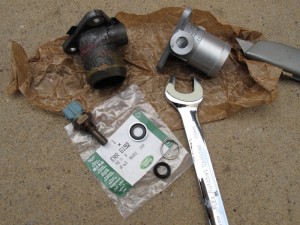
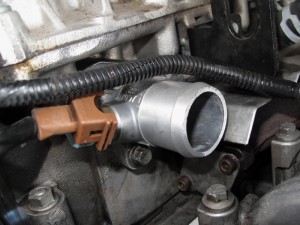
With the elbow removed it gives access to part of the EGR system, so while access was so good I set about removing that as well, but that’s for another post!
With the sensor refitted to the new outlet elbow you then need to offer it up to the cylinder head making sure that the new gasket stays in the correct position, refix using the 3 bolts (10mm) and torque up to 22NM. Reconnect the top hose and secure with spring clip or better still a ‘jubilee’ clip making sure that the top hose is squarely and correctly pushed on to the outlet elbow. Now reconnect the electrical connector for the coolant temperature sensor.
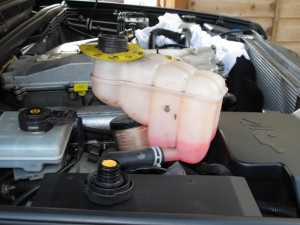
Now to refill and bleed the cooling system. Firstly unclip the coolant expansion tank and raise it as high as it will go with putting any other connections to it under too much stress, I propped it up on a can of copper grease giving me about a 100mm height gain. Next remove the bleed screw from the top of the top hose (it’s worth having a spare one of these as they’re only plastic and can break quite easily), what you need to do now is pour fresh coolant in to the expansion tank until coolant flows freely without bubbling from the bleed screw. Once you achieve this, quickly replace the bleed screw. Now reclip the expansion tank in to place and recheck all joints, now run the engine up to temperature and check once more for any leaks, if there are no leaks let the engine cool and if necessary top up expansion tank to the required level.
The parts I used were a ‘outlet elbow’ ERR7097, ‘outlet elbow gasket’ LVJ000010, ‘coolant sensor washer’ ERR6192 and should you need it ‘bleed screw’ PYP10008L. I also replaced the spring clip with a 50mm stainless steel ‘jubilee’ clip and used approximately 2.5litres of coolant to top the system back up.
Finally, once you’re happy there are no leaks replace the engine acoustic cover and that’s it, job done.
Pingback: Coolant Outlet Elbow Replacment |
Great write up and pictures, I did this exact same job over the weekend and despite checking Rave, I couldn’t find the correct torque settings anywhere, luckily for me, you had them listed and I was able to torque the elbow bolts correctly. Thanks for taking the time to list this
Thanks for your kind comment, glad it was of use to you.
Ian.